Showing posts with label Jenkins. Show all posts

Thursday, July 20, 2017

Job creation in Jenkins: Workflow

Below are the steps to create a new job in Jenkins:

1. Launch Jenkins by providing the url and port number of Jenkins Server. 

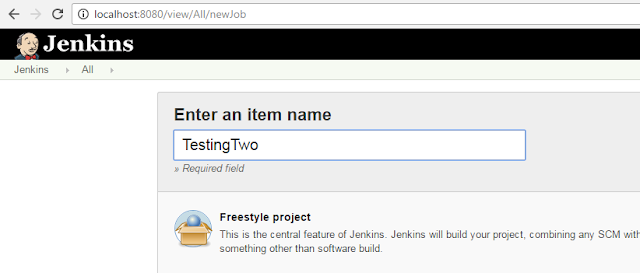
2. Click on New Item to create a new Jenkins Job. Provide the jenkins Job Name and select the project type. Let us select a freestyle project.

New job Jenkins
3. There are different sections in the jenkins Job which are shown below.

4. Below Flowchart explains the different information we can provide in a jenkins job and what is the role of different sections in a jenkins job.Jenkins job creation workflow

5. General Section:Job Description is provided in this section. Managing different build Information and adding Parameters used in job are some of the tasks which can be defined in this section. 

6. Source Code Management: This section provide instruction on how to extract latest code in the workspace,  from git, svn or local system.


Source Code Jenkins


7. Build Trigger : This section define how the job can be triggered, Whether it is dependent on existing job or is scheduled to run on a fixed time and date periodically.


build trigger Jenkins


Build Environment: This section manages the build environment or workspace with option to clean the workflow before build execution or abort/fail a build if it is struck at a step for long period.
build environment Jenkins 


Build - This is the main section where the actual batch files/ shell command or ant targets are invoked. For testing purpose , we can invoke a maven project in this section. Executing a job means executing the commands provided in the build section.

build Jenkins


Post Build Steps - These are post build steps and include activities like archiving artifact or sending a mail with build details or publishing testng/junit test results.

Post build Jenkins

Monday, May 15, 2017

Jenkins - Adding a conditional build step.

In Jenkins, at times we may require Jenkins to execute some build step on one condition and another in case of other condition. For e.g: It may be required to run a particular test/batch command on Weekdays and some other batch condition on weekends. We can create a job to perform different tasks based on the condition satisfied. 

To add a conditional build step, follow below steps in Jenkins.

  • Navigate to Jenkins>Manage Jenkins>Manage Plugins and go to available tab.
  • Search for Conditional buildstep as shown below and click on install without restart.
  • It will install the plugin and will show success once installation completes.
  • Now the plugin can be used in the Jenkins job as shown below.In the job, add build step as Conditional step (single)

  • Provide the conditional step from the list as shown below and execute the build command.


Saturday, May 6, 2017

Reload configuration from disk - Jenkins

In case of migration of existing jobs from one Jenkins setup to another setup or removing old build information from the disk, we can use the option to reload configuration from disk in Jenkins. Below are the steps to be be followed to reload configuration from disk:


  • When we set up jenkins in a machine, there is a folder with name .jenkins in location c:/users/<UserName> folder.

  • When we open the .jenkins>jobs folder, we see the folders for the jenkins jobs we have created in jenkins. 

  • We can copy folders from another jenkins instance and paste in this folder. Similarly we can make changes in the logs information or builds information.

  • Once we have made the required changes in the jenkins set up. Open Jenkins using localhost:8080 (assuming you are on the jenkins server itself and 8080 is the port used for jenkins and is installed as a window service on the server. Else if accessing from a remote client machine, use the address <machine name>:<port number>

  • The jenkins home Page will open as shown below.
  • Click on Manage Jenkins and in the Manage Jenkins Page, click on Reload configuration from disk as shown below. This will reload the changes made in jenkins set up.

Sunday, February 26, 2017

Importing jobs from one jenkins installation to another

Using Job import plugin, we can import Jenkins job from another machine to our machines. This is useful in migrating jobs from one setup to another or a new Jenkins setup. 

Below are the steps to copy jobs from one Jenkins set up to another.

  • We require Job Import plugin to be installed to import job from one machine to another. In case plugin is not installed, Go to Manage Jenkins > Manage Plugins. 
  • Click on Available tab and search for Job import plugin.

  • Select the checkbox and click on Install without restart.
  • Once Jenkins is installed, Job Import plugin will be displayed in the menu.
  • Next to import the jobs from another Jenkins URL, click on Job Import plugin
  • Provide the Remote Jenkins URL and credential to connect to Jenkins and click on Query!
  • Once we click on Query!, Jenkins job will be displayed from the remote Jenkins.
  • Select jobs to be imported and click on import.
  • Jobs will be imported once user clicks on Import.

Saturday, February 25, 2017

How to run Jenkins on port other than 8080

By default Jenkins start at port 8080, but at times port 8080 is already used by some other application. We can run Jenkins on port other than 8080 by following below steps:
  • In case jenkins is running through command prompt, we can start jenkins to run at port 9090 or any other port using below command:
java -jar jenkins.war --httpPort=9090
  • To change the port permanently, follow below steps:
    • Go to jenkins home folder. The jenkins home folder is usually at C:\Program Files (x86)\Jenkins in case jenkins is installed from microsoft installer (MSI) file or it can be c:\Users\<UserName>\.jenkins folder.
    • Open the jenkins.xml file.
    • Change the port number in the file to the required port number.
    • Save the file.
    • Restart the window service for jenkins.

Friday, February 24, 2017

Jenkins - Cloning an existing job in jenkins

We can clone an existing job in Jenkins using the steps below. Copying a Jenkins job is useful in case there is minor changes in the two job configurations.

Steps to be followed:
  • In Jenkins, we can see all the existing jobs in the dashboard and option to create a new job by clicking on New Item
Jenkins - cloning existing job
  • On clicking on new Item, a new page will be displayed to select project type and name of the item. Provide the name for the item.

Jenkins - cloning existing job
  •  In the bottom of the page, there is a option to copy from existing item. Provide the existing job name and click on OK.
Jenkins - cloning existing job
  •  The new job will be created and displayed in the dashboard. Make necessary changes in the job and save.
Jenkins - cloning existing job


Friday, December 23, 2016

Install Jenkins as a Windows service

Once we have installed the jenkins setup, we need to launch jenkins.war file manually before accessing jenkins as shown below. To avoid running jenkins.war manually to start jenkins, we can install jenkins as a window service.


Steps to install Jenkins as window service:


1. From the localhost jenkins machine, run the jenkins.war files as shown above.

2. Once Jenkins is up and running, open localhost:8080 in the browser.

3. Go to Manage Jenkins> Install as Windows Service.

4. Follow steps in below screenshot to install Window Service.


5. Go to run>services.msc. Jenkins should be installed as a service.


How to configure jenkins for user access without login authentication

In the previous article, we explain how to install Jenkins.  Jenkins setup on localhost server
Once Jenkins is installed, we can connect to Jenkins from localhost:8080 or <ServerName>:<Port Number> from the browser.

Once we open the url, It asks for username and password to connect to the jenkins server. In most cases, we require username/Password authentication to connect to the jenkins server as shown below:
:


However, In case we want everyone gets full access to the system and do not need to login , We can skip user authentication using below steps:
  • Navigate to .jenkins folder (Location: c:\users\<user acc>\.jenkins)
  • Open config.xml file in the folder.
  • set element<useSecurity> value as false.
  • Remove elements authorizationStrategy and securityRealm as shown below:
  • Restart Jenkins
  • Once Jenkins restart, acess localhost:8080 (check if port is same or different in your jenkins)
  • It will not ask for Username and password as shown below and jenkins dashboard will be displayed as shown below


Saturday, September 3, 2016

Jenkins setup on localhost server

 
  • Downloading Jenkins
    • Download Jenkins from Jenkins official site.
    • Jenkins.war will be downloaded.


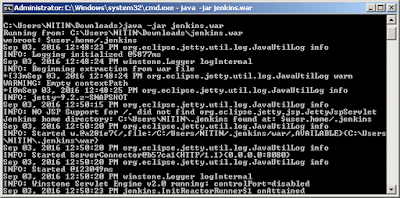
  • Go to command prompt and navigate to folder in which Jenkins is downloaded
  • Run below command in command prompt
  • java -jar jenkins.war


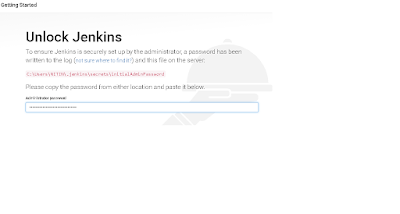
  • Navigate to localhost:8080 on the machine where jenkins is run. The page asks to provide the admin password and the location from where to copy the password.
  • Provide the Password


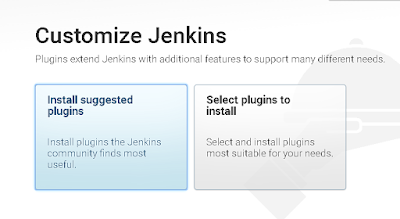
  • Select the suggested plugins to install


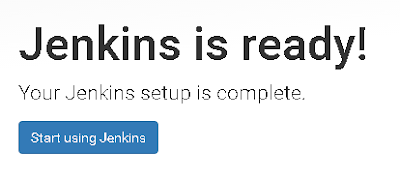
  • Now we can use Jenkins  

  • Jenkins set up is complete. Click on start using Jenkins for creating jobs.


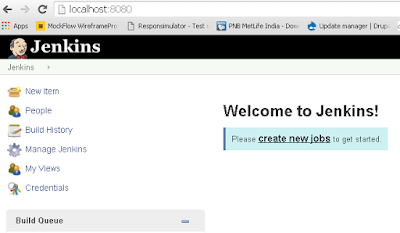
  • Jenkins dashboard will be displayed